Every gardener knows the heartbreak of damping-off disease, sudden mold outbreaks, or a sudden cloud of fungus gnats taking over their indoor seedlings.
Sterilizing your soil is the ultimate preventative strike. It wipes out the bad guys: bacteria, viruses, mold, fungal spores, weed seeds, and those hidden insect eggs or larvae. But if you’ve ever tried the classic method of baking raw dirt in your kitchen oven for hours, you already know the major downside: it stinks up the entire house with a terrible, burnt-earth odor.
Fortunately, you don’t have to choose between clean soil and a clean-smelling home. Here are 7 highly effective, practical alternatives to sterilize your garden soil, followed by how to bring it back to life afterward.
The Golden Rule of Soil Sterilization
Before choosing a method, there is one non-negotiable rule you must follow to protect your plants:
The 180°F (82°C) Ceiling: Never allow your soil temperature to exceed 180°F. Going above this threshold burns off organic matter and triggers the release of phytotoxins (substances toxic to plants) like excess ammonium and soluble salts, which can stunt or kill your seedlings.
Note: For all indoor heat methods, ensure your soil is damp, not soggy. Moisture turns into steam, which is what actually penetrates and kills the pathogens.
7 Better Ways to Sterilize Your Soil
1. The Instant Pot Method (Best for Speed & Zero Odor)
The Instant Pot is a sealed pressure cooker, making it the absolute best tool for containing earthy smells while achieving a deep, uniform sterilizing steam.
- How-to: Pour 2 cups of water into the inner pot and insert the steam rack. (If your rack sits too low, prop it up with extra metal canning rings so it stays clear of the water). Pack your damp soil into glass mason jars, cover the tops loosely with aluminum foil, and set them on the rack.
- Time: Pressure cook on High for 15–20 minutes.
- Crucial Step: Let the cooker naturally release pressure and cool completely before opening.
2. The Sous Vide Stick (Best for Precision)
An immersion circulator (sous vide) is designed for exact temperature control, making it impossible to accidentally overheat your soil and create toxins.
- How-to: Place damp soil inside a heavy-duty oven bag or heat-safe zip-top bag and seal it tightly. Place the bag into a large pot filled with water. Because soil bags float, place a clean rock, brick, or heavy ceramic plate on top to keep it fully submerged.
- Time: Set your sous vide stick to 180°F (82°C) and let it run for 1 hour once the water reaches temperature.
3. The Microwave (Best for Small Batches)
If you just need a few cups of soil for a single houseplant or a small seed tray, the microwave is incredibly fast.
- How-to: Put damp soil into a microwave-safe plastic bag. Leave the bag partially open or poke a few small holes in the top to let steam escape so it doesn’t burst.
- Time: Microwave on high for 90 seconds per pound of soil. Let it sit inside the microwave for a few minutes afterward to let the residual steam finish the job.

4. The Stovetop Steamer (The Classic Alternative)
This mimics laboratory autoclaving using standard kitchen gear you already own.
- How-to: Pour a couple of inches of water into a large pot and set a steaming rack or a metal colander inside (again, ensuring the bottom doesn’t touch the water). Fill the colander with damp soil, cover the pot with a tight-fitting lid, and bring the water to a boil.
- Time: Steam for 30 minutes. Keep an eye on the water level so the pot doesn’t boil dry.
5. The Slow Cooker / Crock-Pot (Best for Large Indoor Batches)
A great set-it-and-forget-it option for a larger volume of potting mix.
- How-to: Fill your slow cooker with damp soil, put the lid on, and turn it to the Low setting.
- Time: You will need a kitchen or soil thermometer for this one. Monitor the batch until the core temperature reaches 160°F–180°F (71°C–82°C), then let it hold that temperature for 30 minutes. Turn it off and let it cool.
6. The Boiling Water Flush (Best for Quick Outdoor Prep)
Great for raised beds or small garden patches where you want to plant immediately without digging everything up.
- Option A (In Place): Gently and evenly pour a rolling boil of water directly onto your garden bed. Let it saturate the top few inches of soil, then allow it to cool and drain.
- Option B (In a Container): Place your soil into a heat-safe tub or large metal pan. Pour boiling water over it, stir thoroughly with a long-handled spoon to ensure no dry pockets remain, let it cool, and drain off any excess.
7. Solarization (Best for Entire Garden Beds)
If you are dealing with a massive weed or pest infestation across a whole garden plot, let nature do the heavy lifting using the greenhouse effect.
- How-to: Thoroughly moisten the target soil bed. Lay a sheet of strong, clear plastic (do not use black plastic; clear traps heat much better) flat over the soil. Trench and tuck the edges firmly into the dirt to seal in the heat and moisture.
- Time: Let it bake in full sun during the hottest summer months for 4–8 weeks. The temperature underneath will skyrocket, cooking pests and weed seeds naturally.

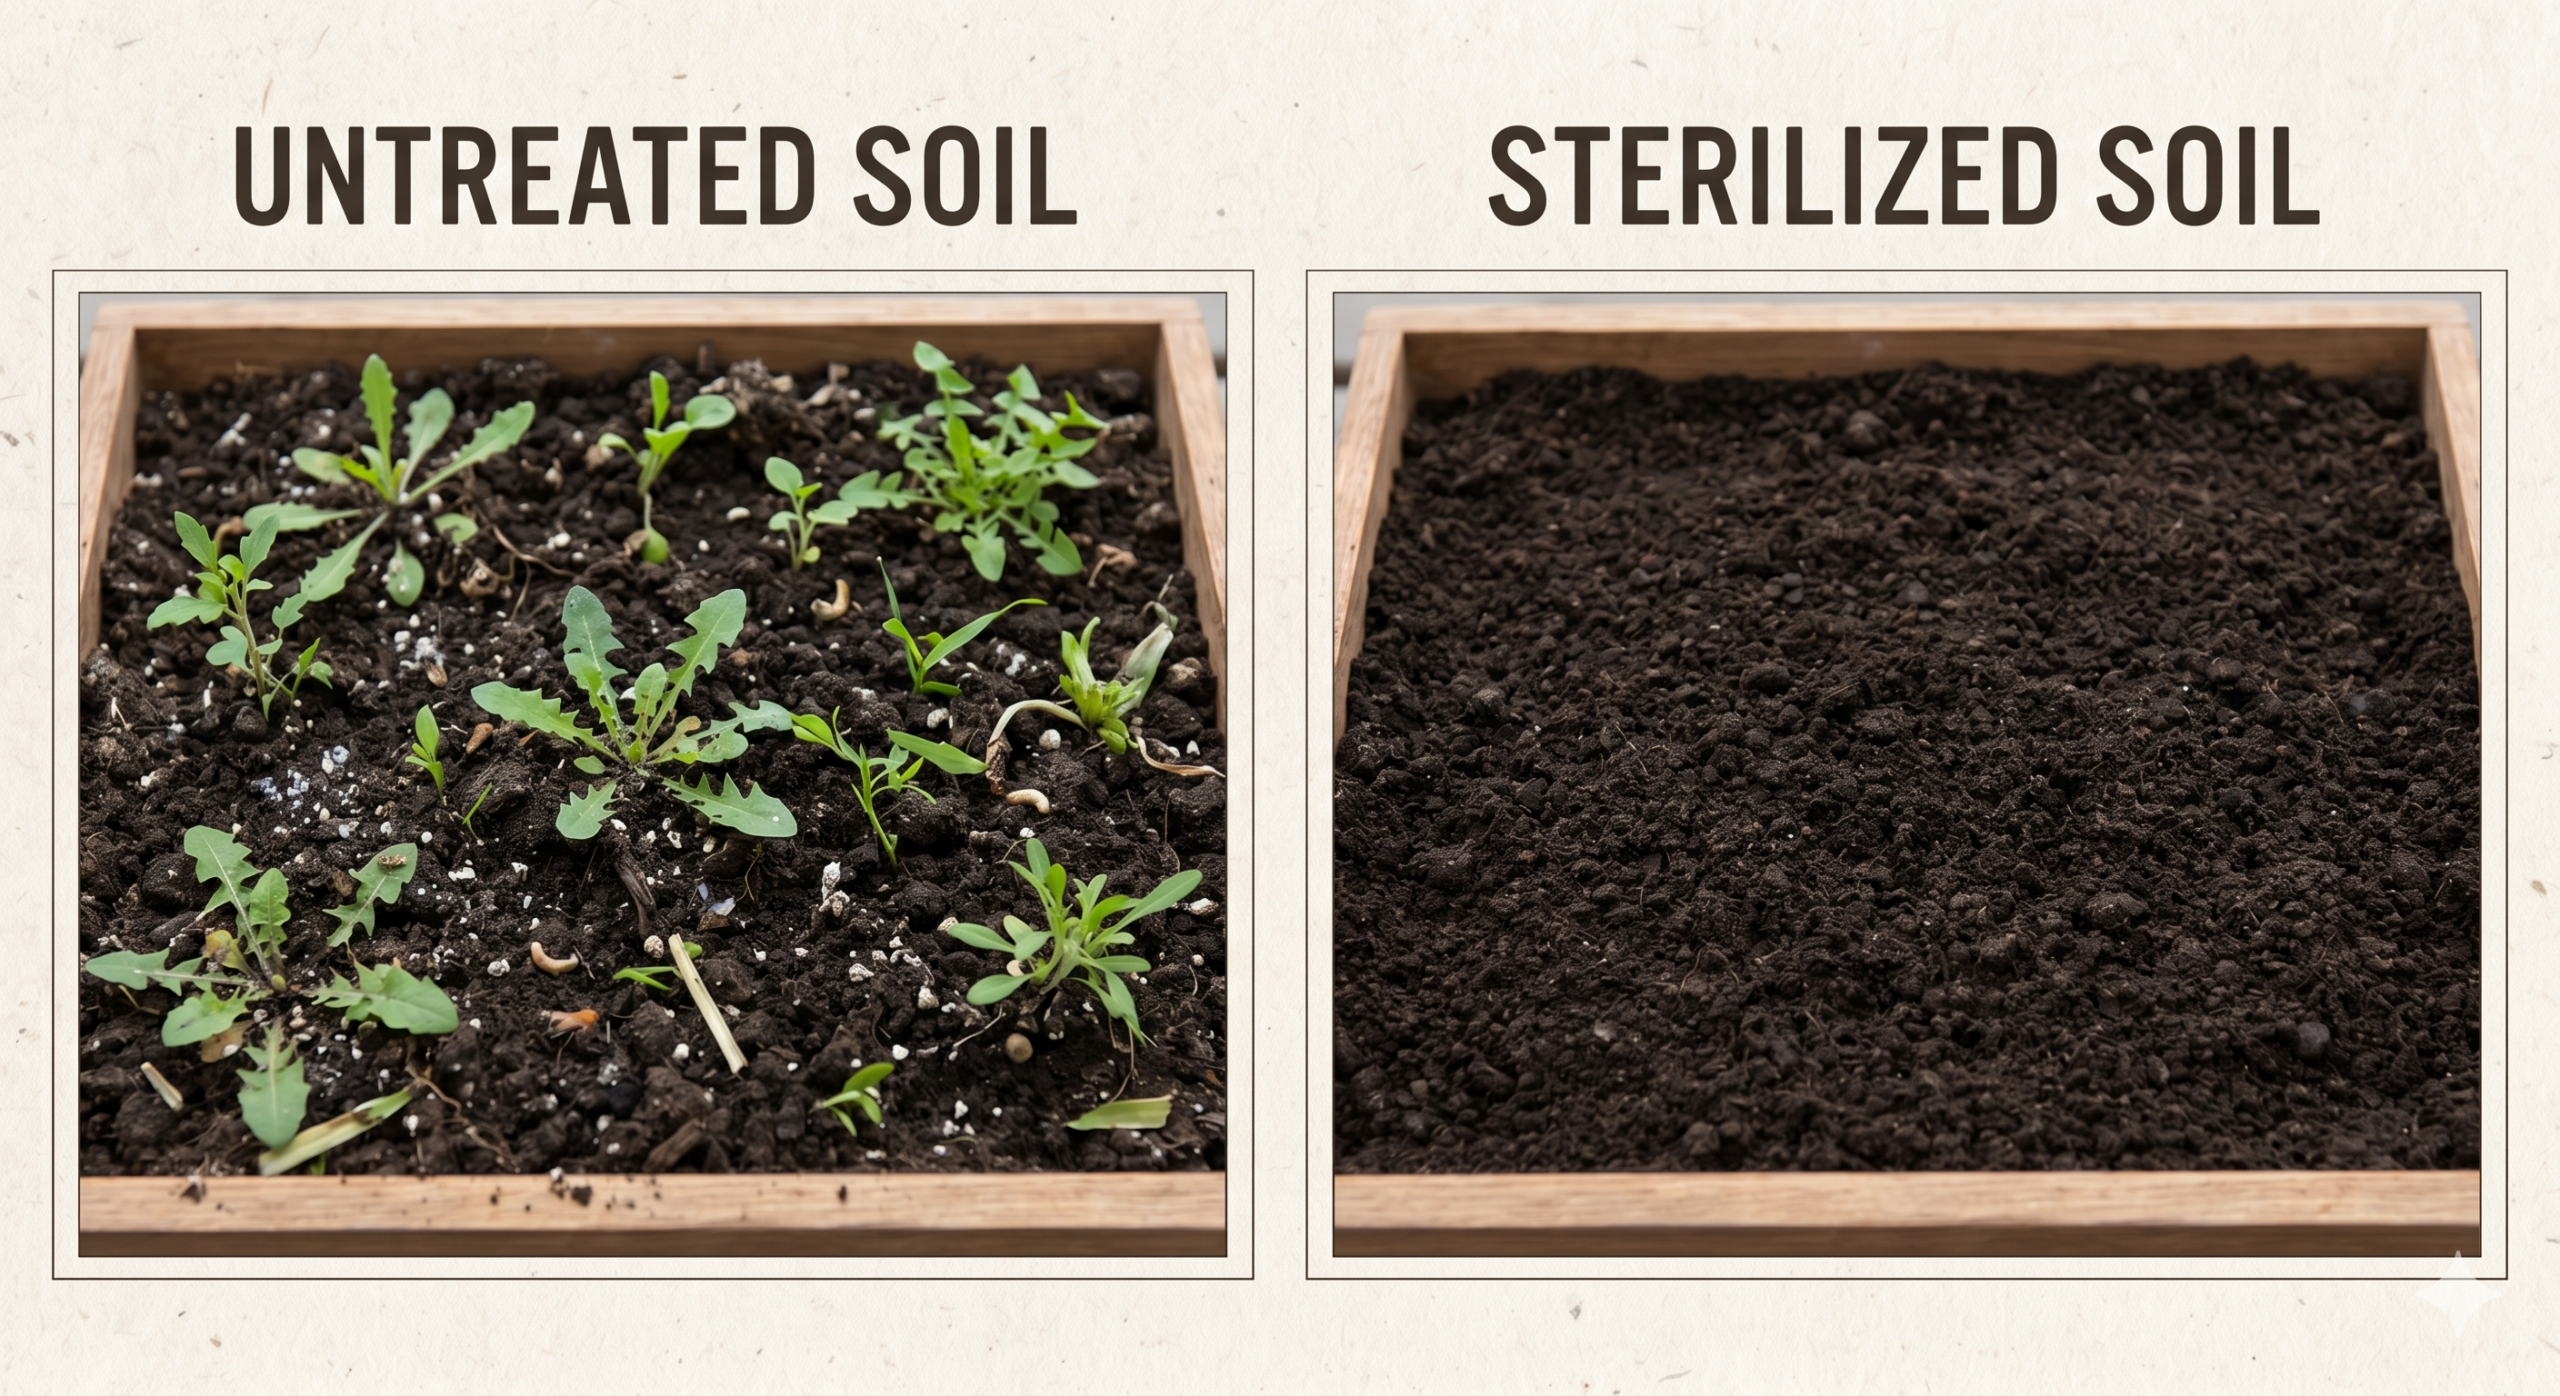
The Catch: Wiping the Microbial Slate Clean
Sterilization is a scorched-earth tactic. It kills the bad pathogens, but it also completely wipes out the beneficial bacteria, mycorrhizal fungi, and microbes that form the “immune system” of healthy soil.
If you leave sterilized soil completely blank, the first airborne mold spore or pathogen that lands on it will multiply aggressively with zero competition. You must re-inoculate your soil to bring it back to life before planting.
How to Re-Bioactivate Your Soil
Once your soil has completely cooled down to room temperature, mix in these organic amendments (many used in permaculture gardening methods) to introduce a diverse ecosystem of beneficial biology:
- Earthworm Castings & Compost: The ultimate biological jumpstart. A handful of high-quality compost or worm castings introduces millions of beneficial microbes instantly.
- Leaf Mold & Wood Chips: These provide excellent long-term food sources for beneficial fungi to establish networks.
- Burying Mushroom Ends: Introduces saprophytic fungi that break down organic matter into plant-available nutrients.
- Cut Straw (Not Hay): Provides structure and carbon for microbes to feed on without introducing new weed seeds (which hay contains).
- Kelp Meal: Packed with trace minerals and growth hormones that stimulate microbial activity.
- Unsulphured Blackstrap Molasses: Carbon and sugar act like an energy drink for bacteria, causing their populations to safely boom right when you need them.
Thank you for your interest. Please comment below and SUBSCRIBE for other random queries and topics by an AuDHD woman.
~ Meadow Cern
scribeworkss.com